Learn how to draw a box in trimetric projection using the vector graphics application Amadine. It is a way to write an object whose shape, color, and angle can be easily modified as you want.
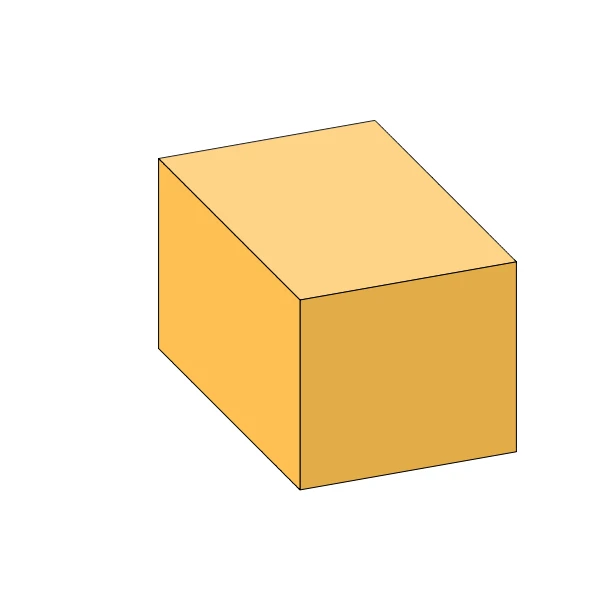
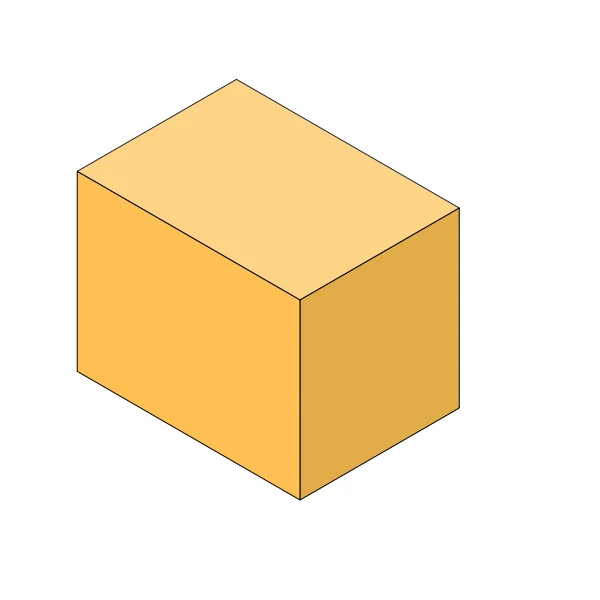
We will draw a box shown below.
How to write a box in trimetric projection
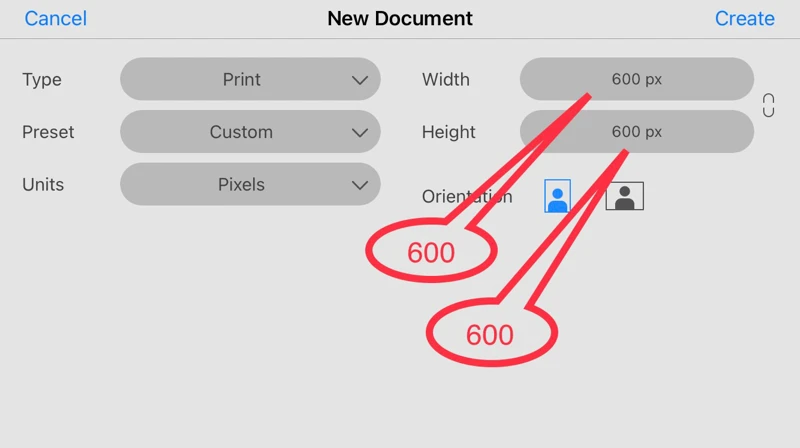
Launch Amadine, select "Create Document" and create a canvas with Width "600px" and Height "600px".
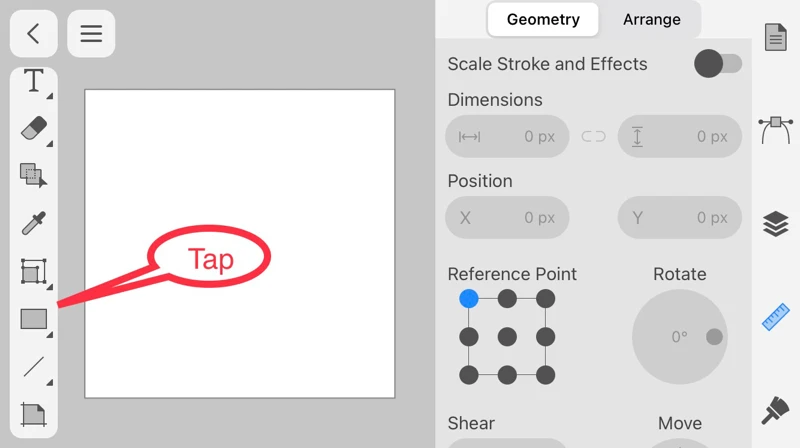
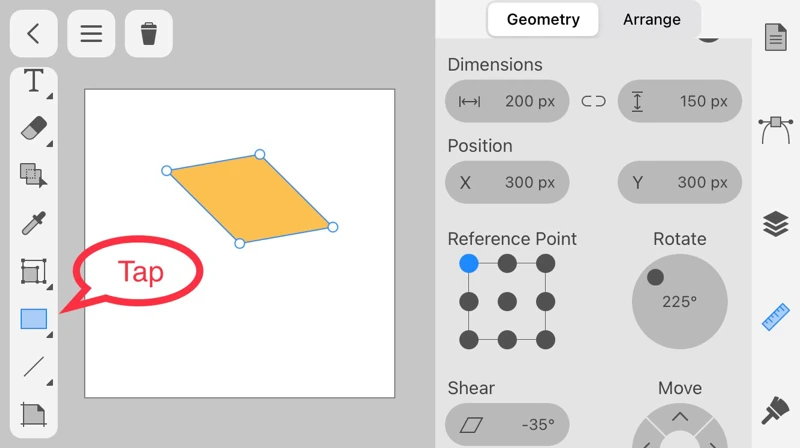
Tap the Rectangle Tool in the Tools panel.
Draw a rectangle on the canvas.
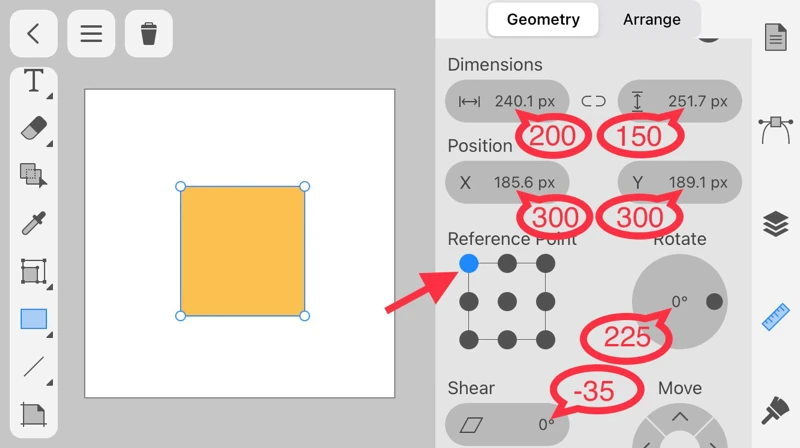
Set Dimension to 200px in width and 150px in height.
Set Reference Point to the upper left, X to 300px, and Y to 300px.
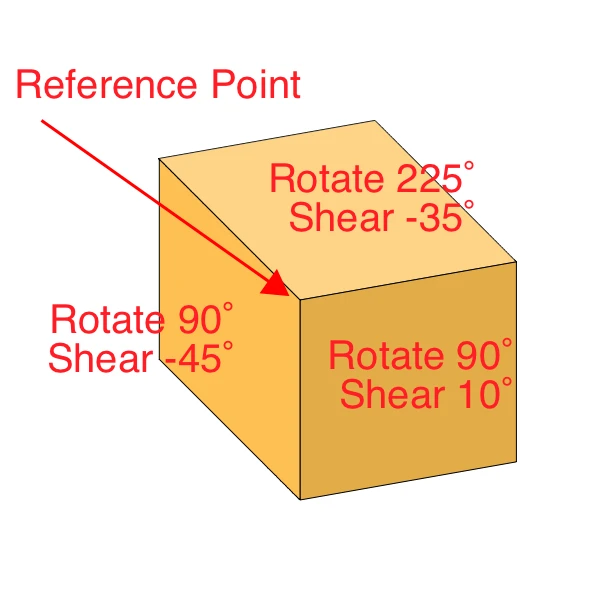
Rotate must be 225 degrees. Shear is -35 degrees.
📌NOTE
The reason for setting Rotate to 225 degrees instead of 45 degrees is to gather the reference points (upper left) of each face into a single location for "angle adjustment," which will be explained later.
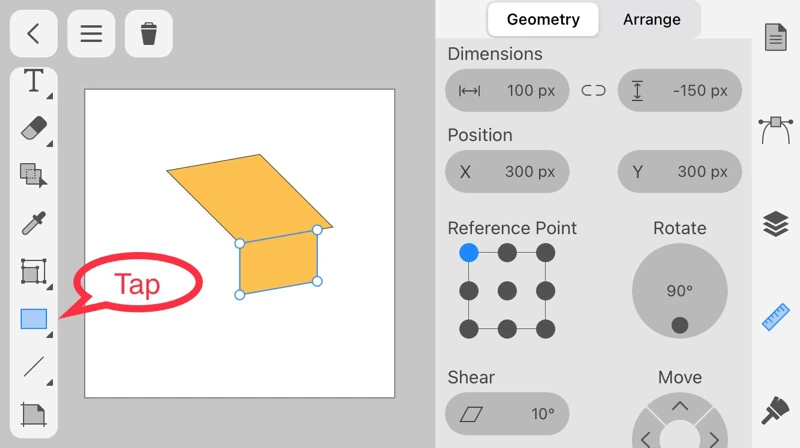
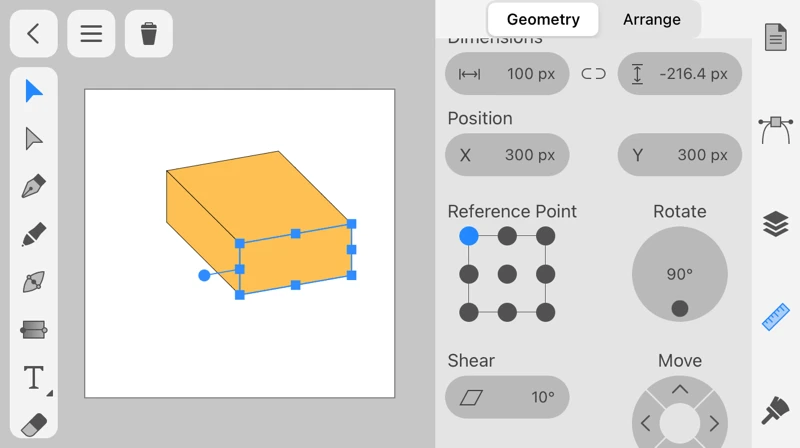
Tap the Rectangle Tool to create the second face.
Draw a rectangle on the canvas.
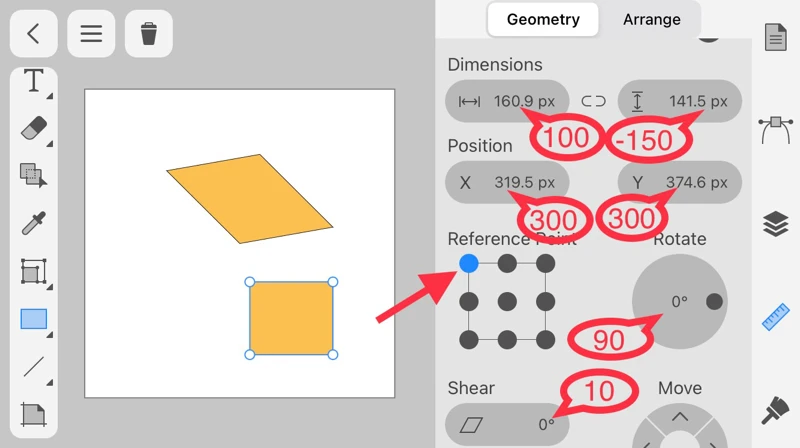
Set Dimension to 100px in width and -150px in height.
Set Reference Point to the upper left, X to 300px, and Y to 300px.
Rotate must be 90 degrees. Shear is 10 degrees.
📌NOTE
Make sure that the height value is negative.
The reason is the same as mentioned above to gather the reference points (upper left) of each face into a single location.
Tap the Rectangle Tool to create the third face.
Draw a rectangle on the canvas.
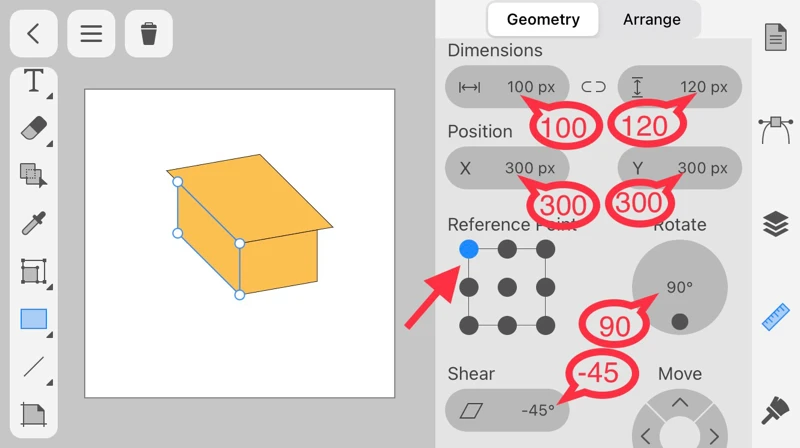
Set Dimension to 100px in width and 120px in height.
Set Reference Point to the upper left, X to 300px, and Y to 300px.
Rotate must be 90 degrees. Shear is -45 degrees.
📌NOTE
The point here is to make the width value the same as the value (100px) set in the second rectangle.
This will align the vertical lengths.
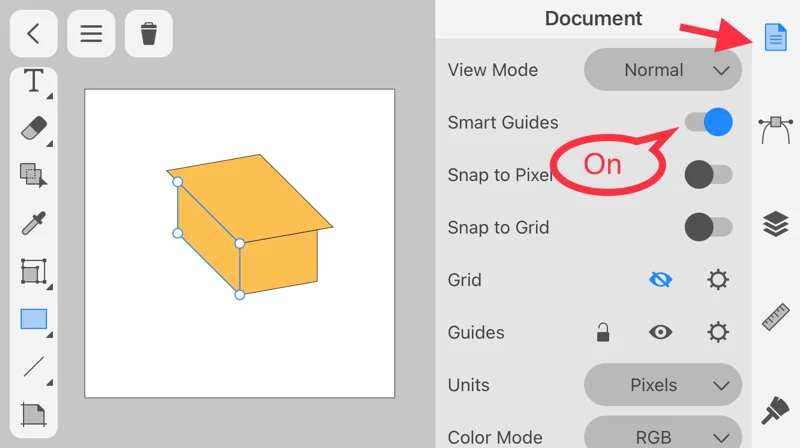
Let’s align the misaligned edges.
Tap the Document Panel and turn Smart Guides On.
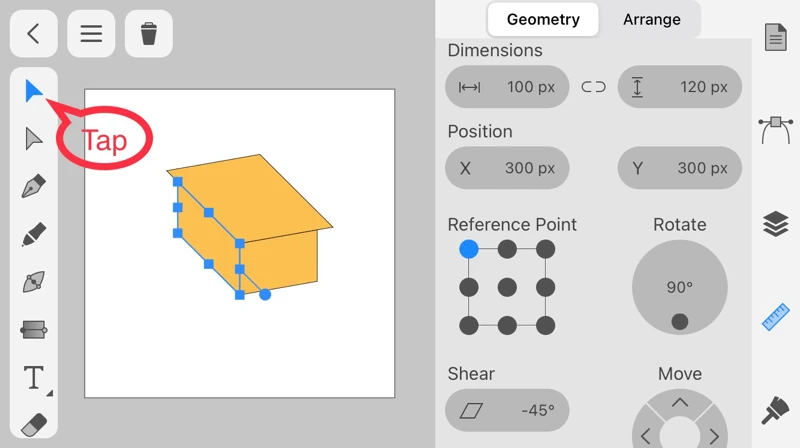
Tap the Move Tool.
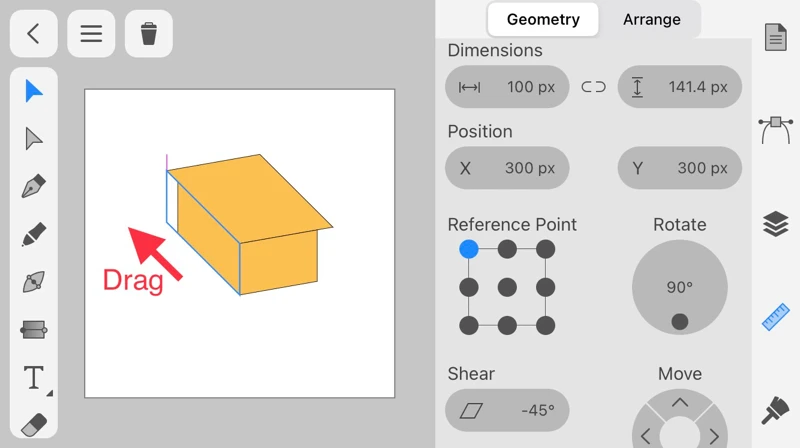
As you drag the edge closer to where you want it to be aligned, Smart Guides will display pink guide line.
When the pink line appears, release your finger.
Drag another edge in the same way.
When the pink line appears, release your finger.
Well done!
How to change the size
Let’s change the size of the created box.
How to make the box larger to the right (or left) side
First, I will explain how to enlarge the box to the right.
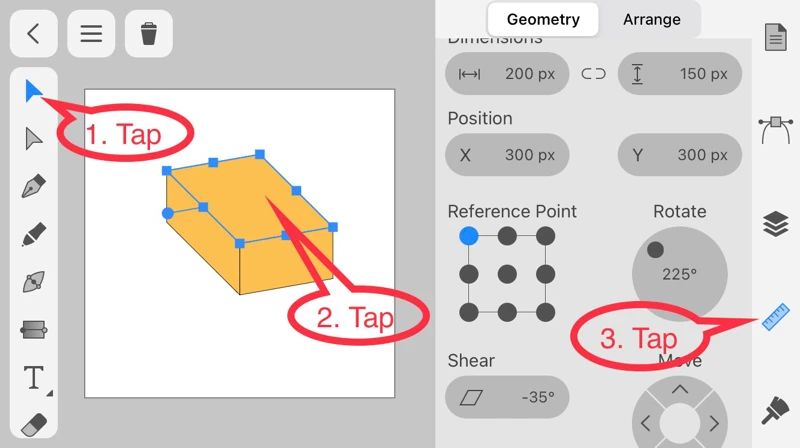
Tap the Move Tool, then tap the top of the box.
Then tap the icon of the geometry panel.
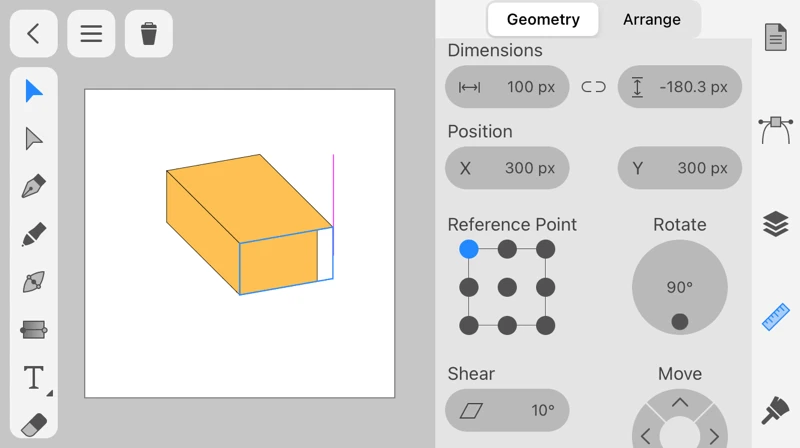
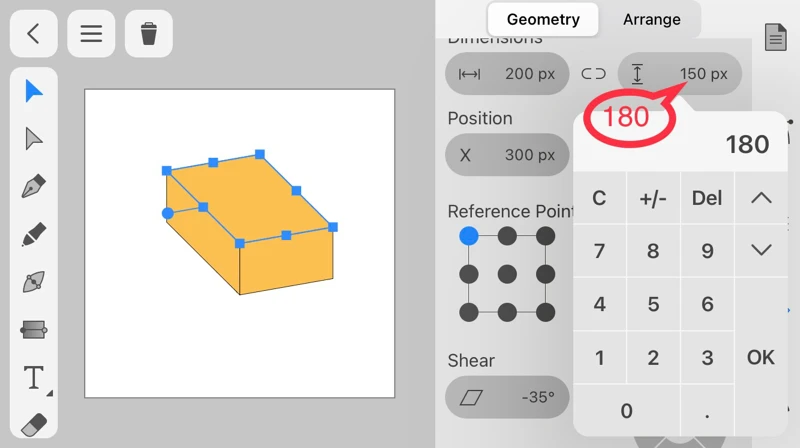
Change the height from 150 to 180.
📌NOTE
If the width, but not the height, is increased, the top of the box will be larger on the left side.
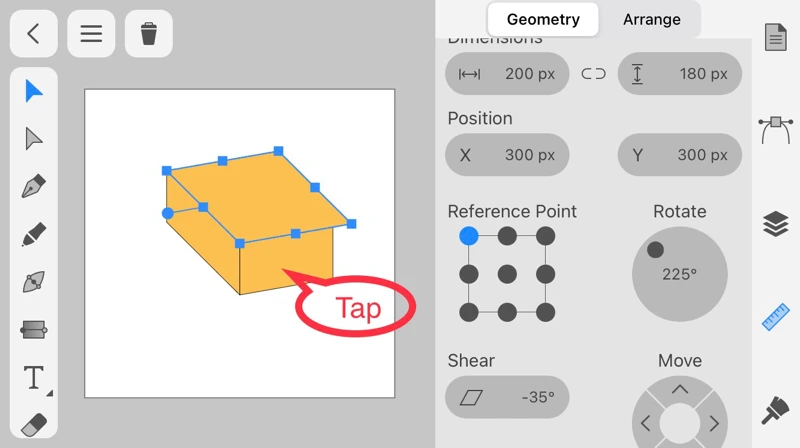
The top face of the box is now larger to the right.
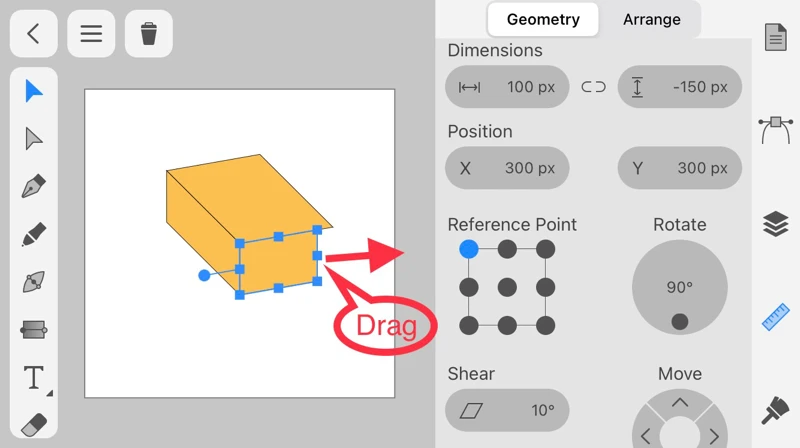
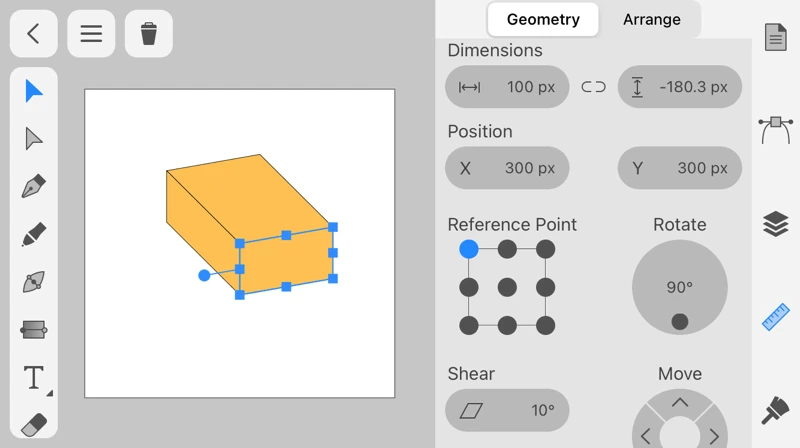
Next, tap on the front face of the box.
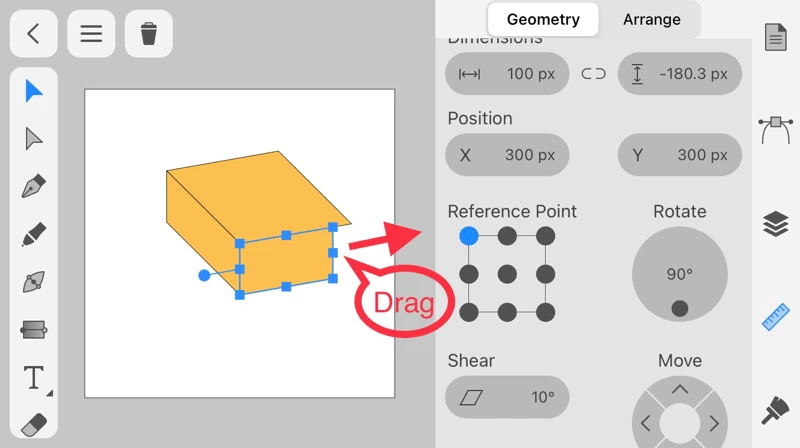
Drag the edge to the right.
When the pink line appears, release your finger.
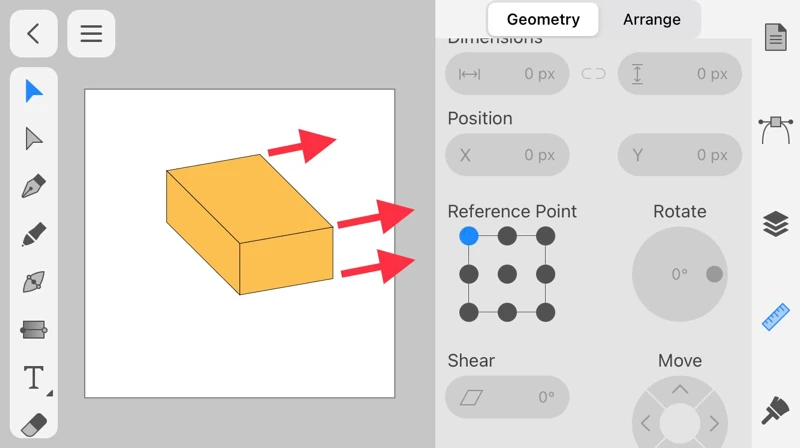
The box has been larger to the right side.
When making the left side larger, increase the width of the top face as described above, and the rest is the same procedure.
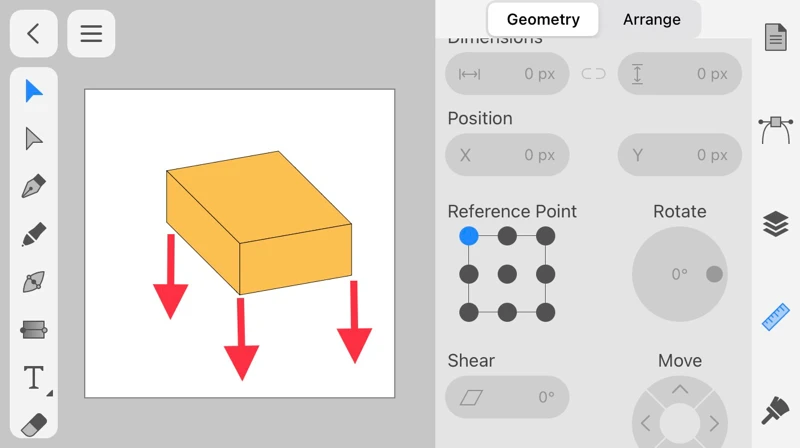
How to make the box larger downward
Next, I will explain how to enlarge the box downward.
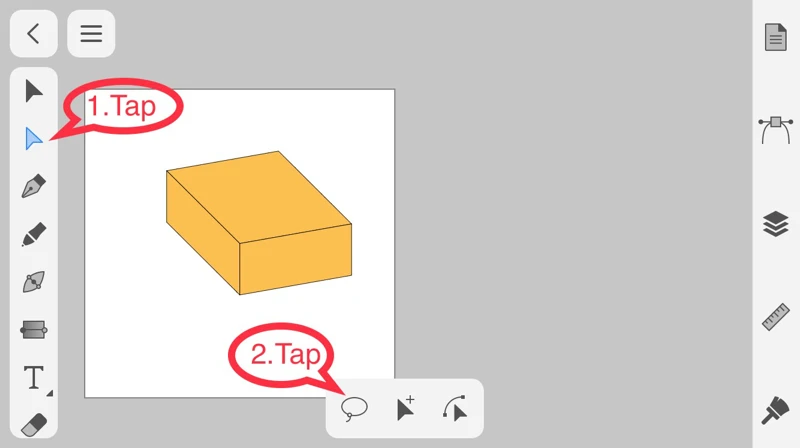
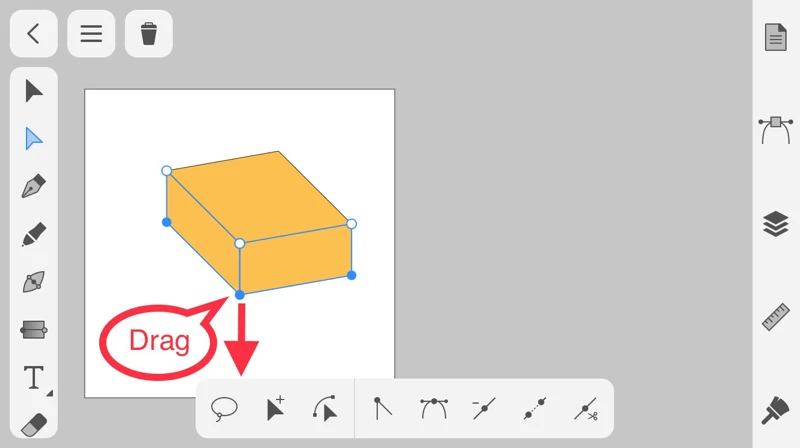
Tap the Selection Tool.
Tap Lasso Tool from the control panel displayed below.
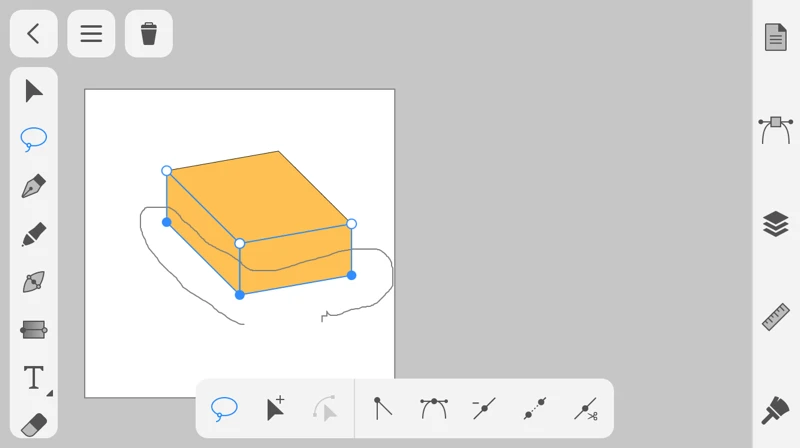
With the Lasso Tool, select all the bottom ends of the sides you want to change the length of.
While touching anywhere on the screen with your finger, drag one of the selected anchor points downward.
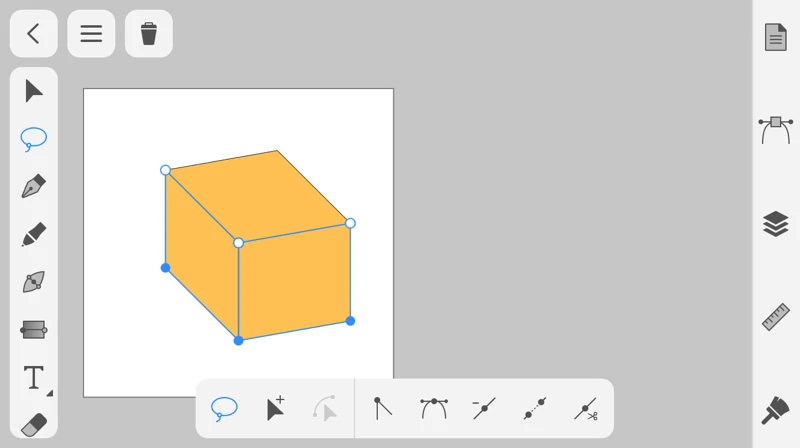
The box has been larger downward.
📌NOTE
To make the box larger to the left or right, resize the top face and drag the side edges.
To make the box larger downward, select the anchor points with the lasso tool, and drag them downward.
How to change the brightness of each face
Now let’s change the brightness of each face of the box.
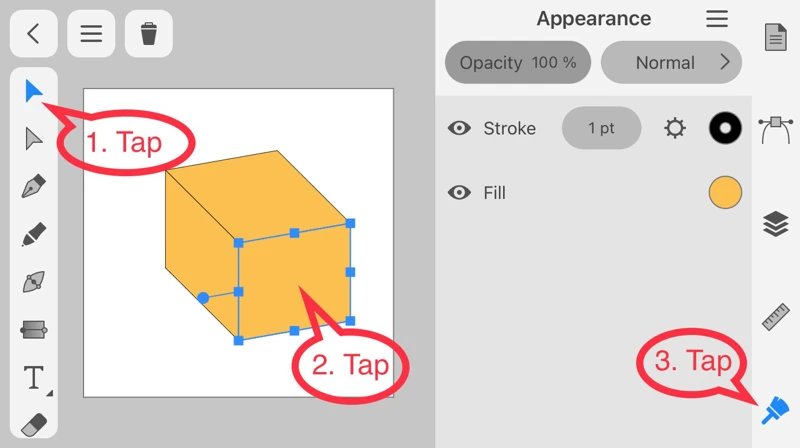
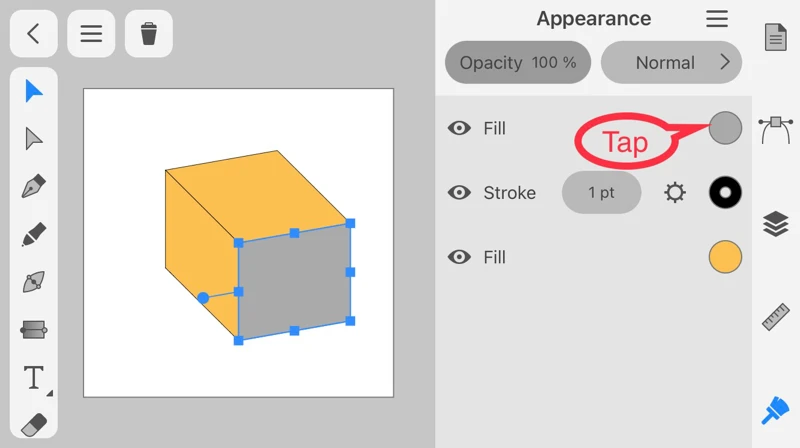
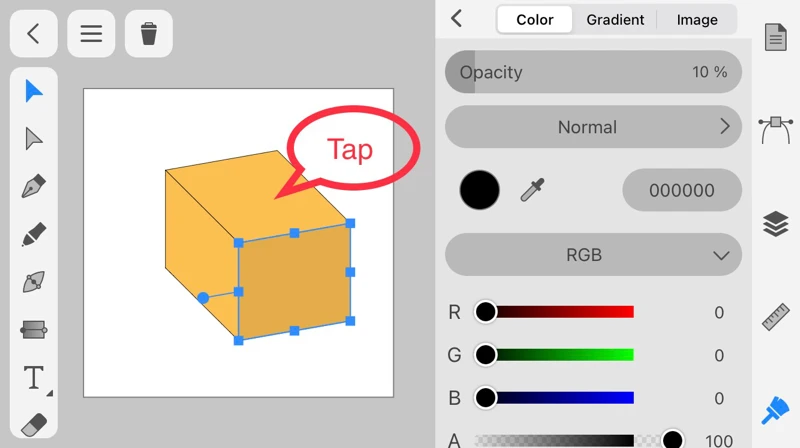
Tap the Move Tool, then tap the face you want to darken.
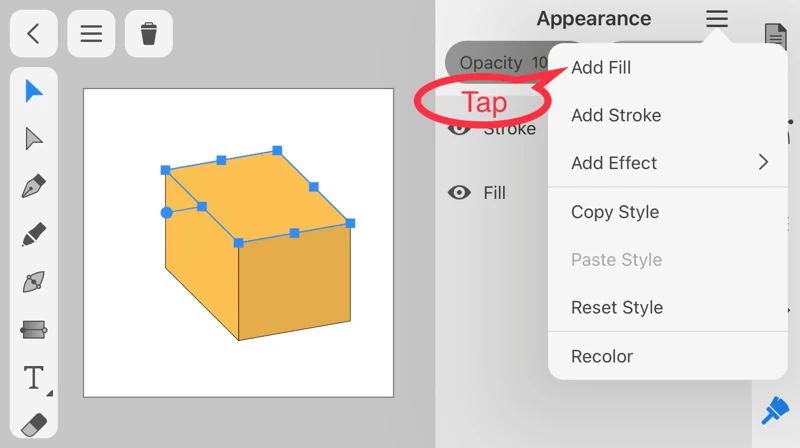
Tap the Appearance icon.
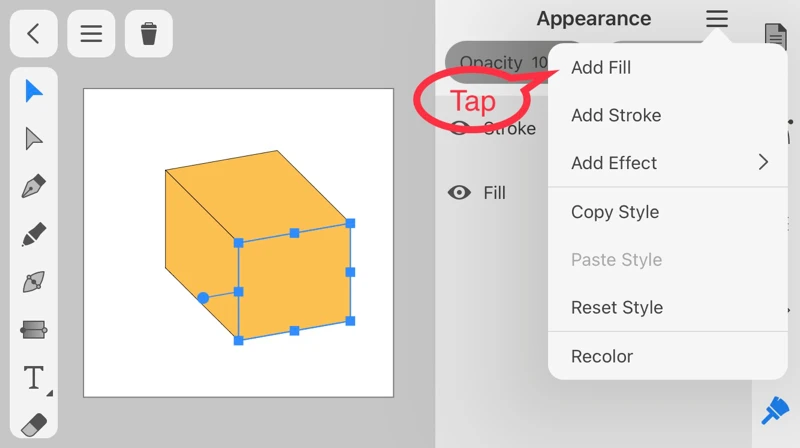
Open the menu at the top right of the Appearance panel and tap Add Fill.
Tap the color icon of the added Fill.
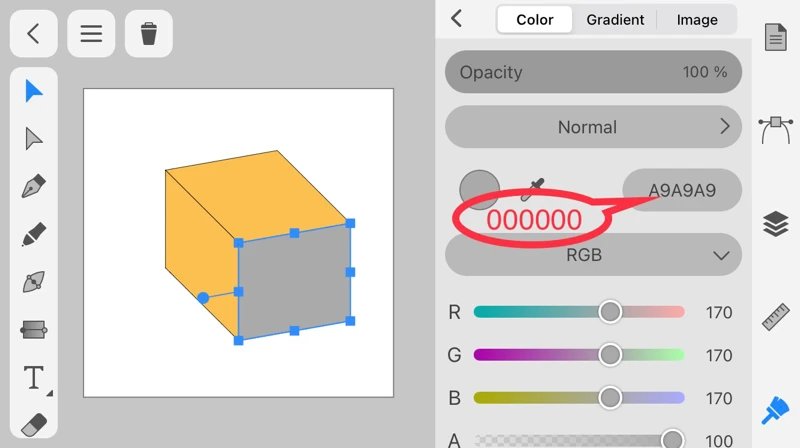
Change the color to 000000, which stands for black.
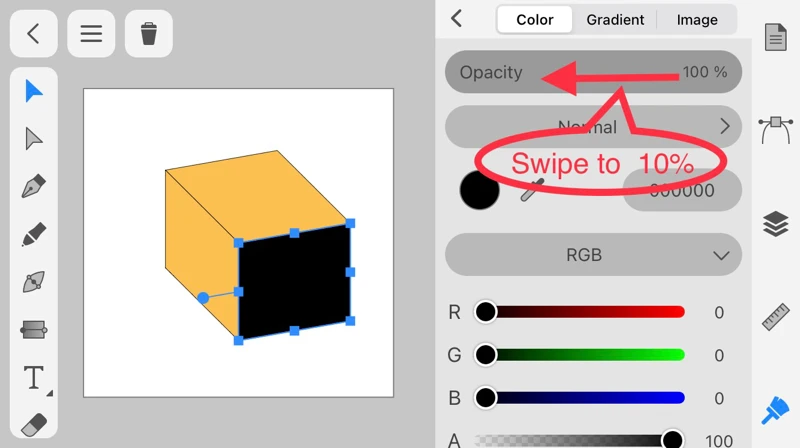
Swipe the Opacity to 10%.
As you can see in the animation, the black color gradually fades as you swipe.
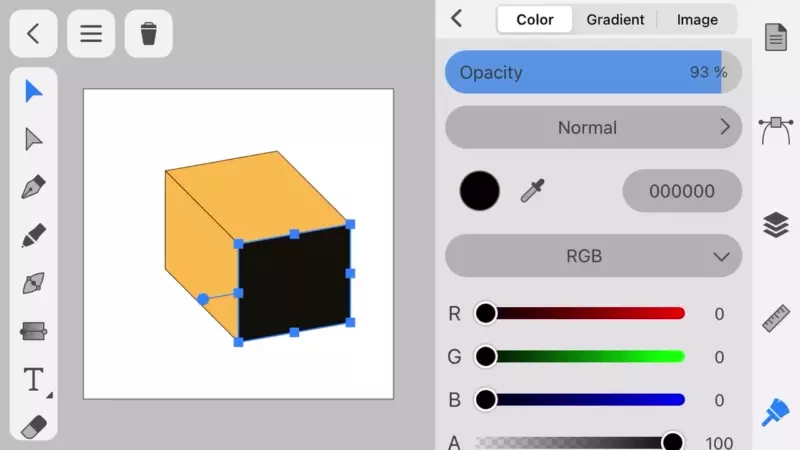
I recommend using Add Fill to adjust the brightness because it is easier to adjust than other methods.
Next, let's brighten the top face of the box.
With the Move tool, tap the top face.
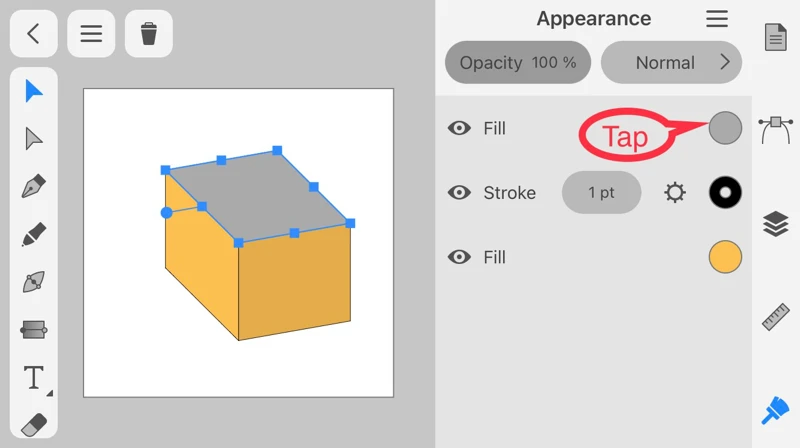
Open the menu at the top right of the Appearance panel and tap Add Fill.
Tap the color icon of the added Fill.
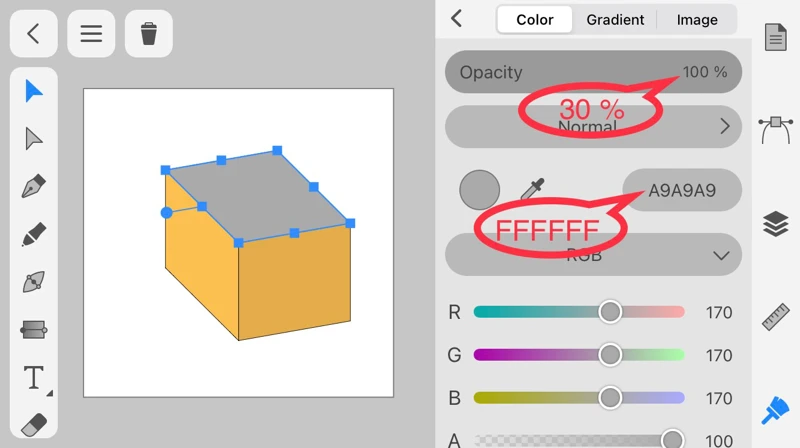
Change Opacity to 30 % and Color to FFFFFF (white).
Well done!
📌NOTE
There are many ways to adjust brightness, but using Add Fill is the easiest to readjust since all you have to do is change Opacity.
How to change the angle
The figure on the left is the box of trimetric projection created by the above method. Let’s change this to isometric projection as shown on the right.
Before
==>
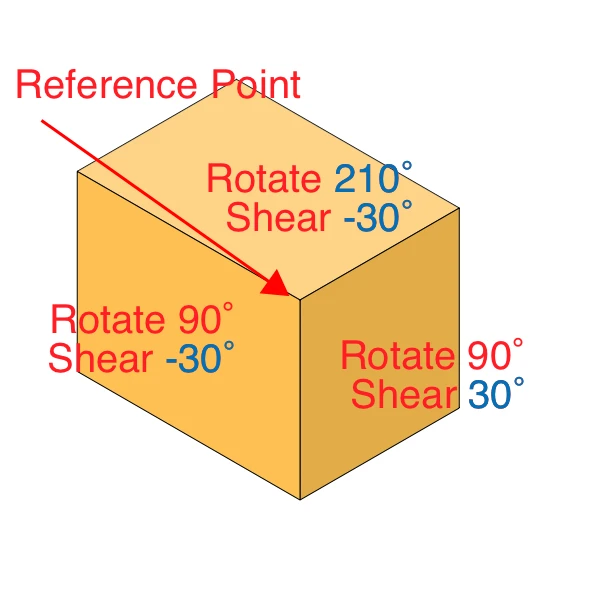
After
Compare the Rotate and Shear values for each face.
The blue numbers are where you have to change.
Before
==>
After
Since the Reference Point on each face is in the same position, you can adjust the angle with Rotate and Shear.
If you adjust the angle, the length of the side will shift, but you can correct it as described in “How to change the size” above.
Amadine does not have a tool for creating 3D objects like Illustrator, but with the method described above, you can easily create objects that can be reused and readjusted.