Error handling when combining sheets with different names in Power Query

The following article shows how to combine Excel books using Power Query, and one of the prerequisites was that all sheets must have the same name.

How to combine multiple excel books into one using Power Query and split it again using VBA
If you are sick and tired of wasting time with cut-and-paste to merge or split excel data, this article is for you.
This article gives an overview of the error when the sheet names are different and how to deal with it.
First, let’s check where the error occurs if only one sheet name is different.
Note that the version of Excel at the time of this writing is Excel 2016.
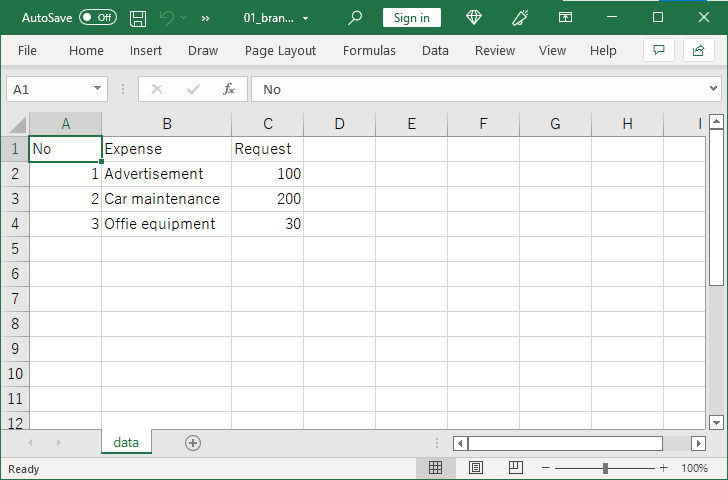
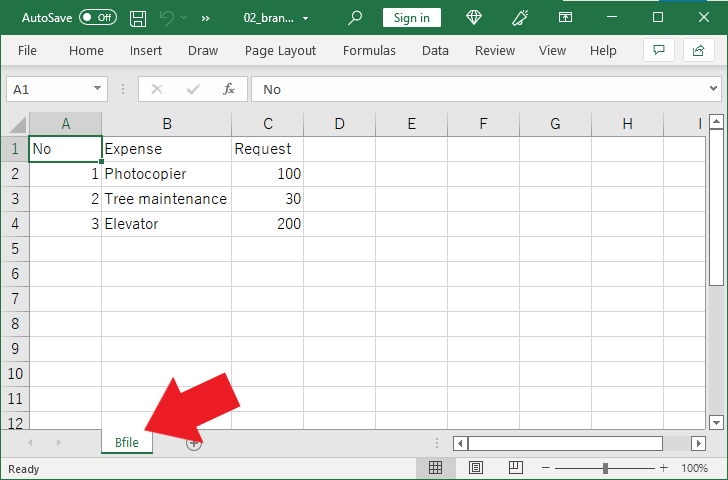
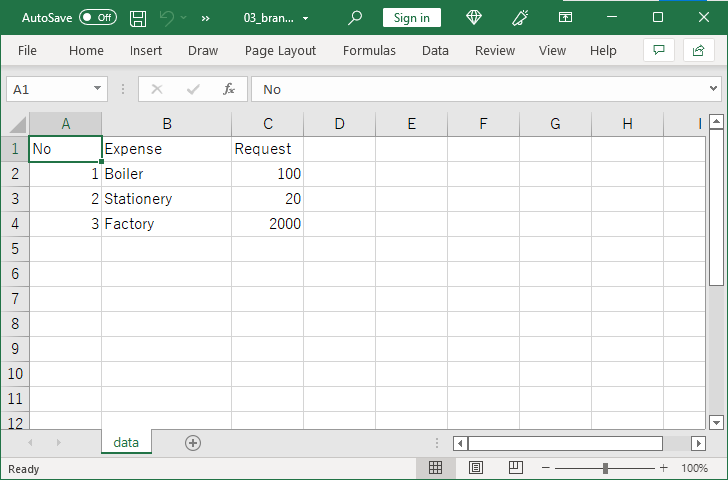
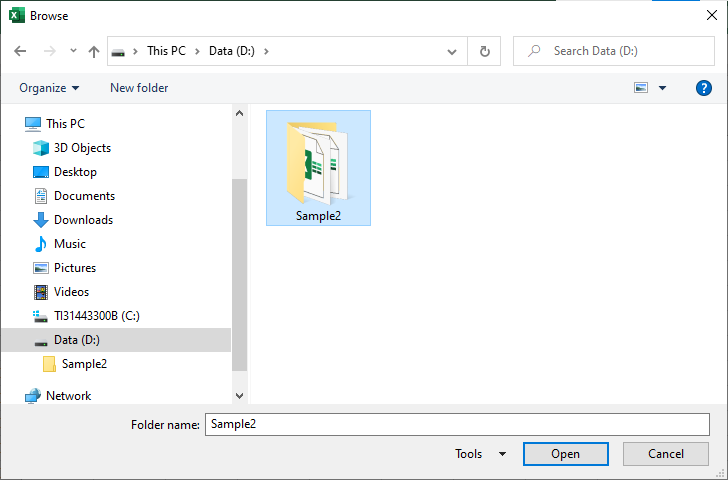
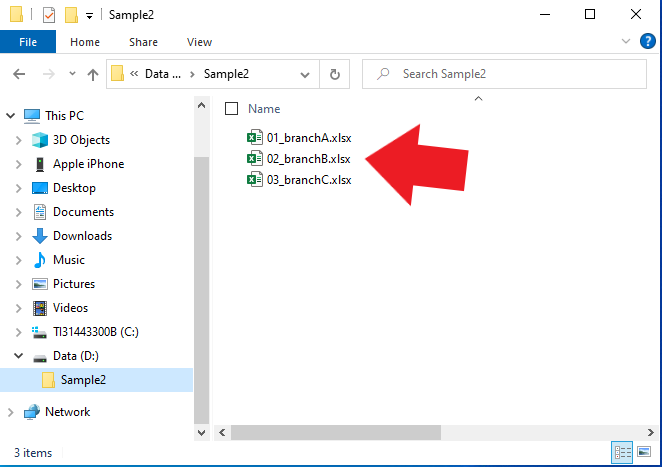
Files for the check tutorial
Please download the file from the link below.

| 📌NOTE |
|---|
|
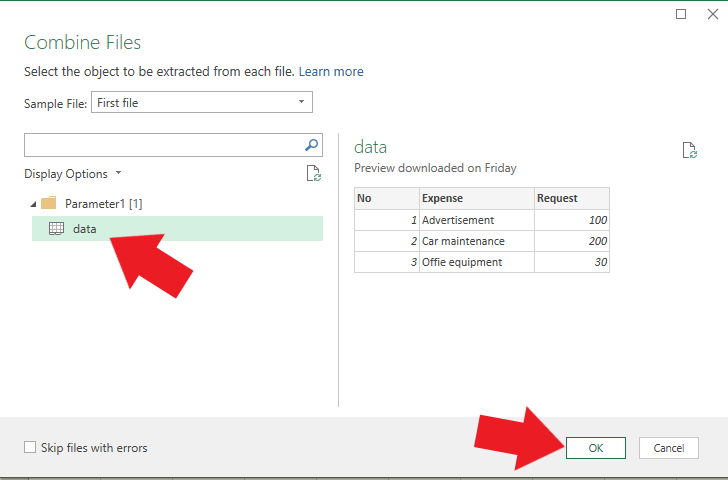
Check where an error occurs
Let’s try combining the above Excel books and find out where the error occurs.
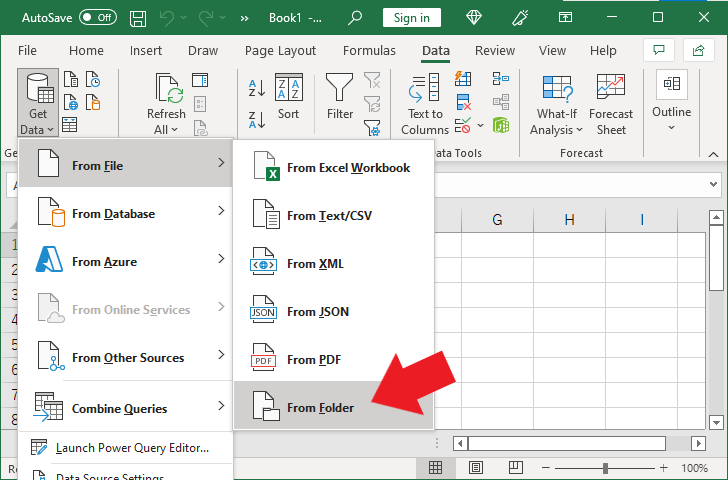
Then click "From File" and "From Folder."

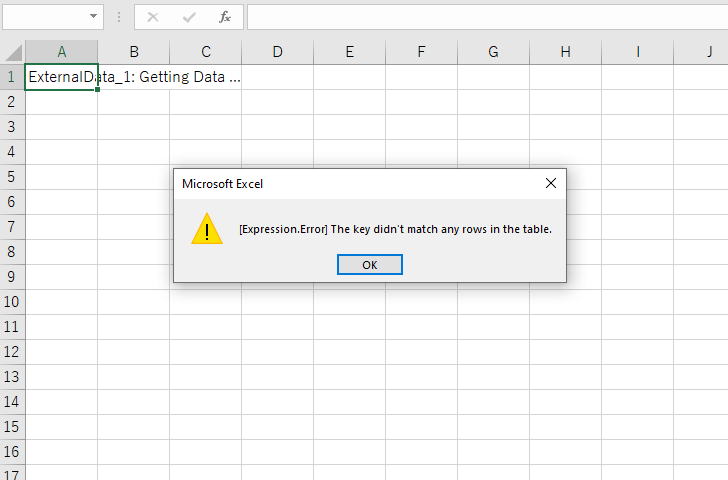
We have found that if the sheet names are different, they cannot be merged and an error is displayed.
How to find an excel book with a different sheet name
In this article, we know that the sheet name of 02_B branch.xlsx is different. But I will show you how to find it.
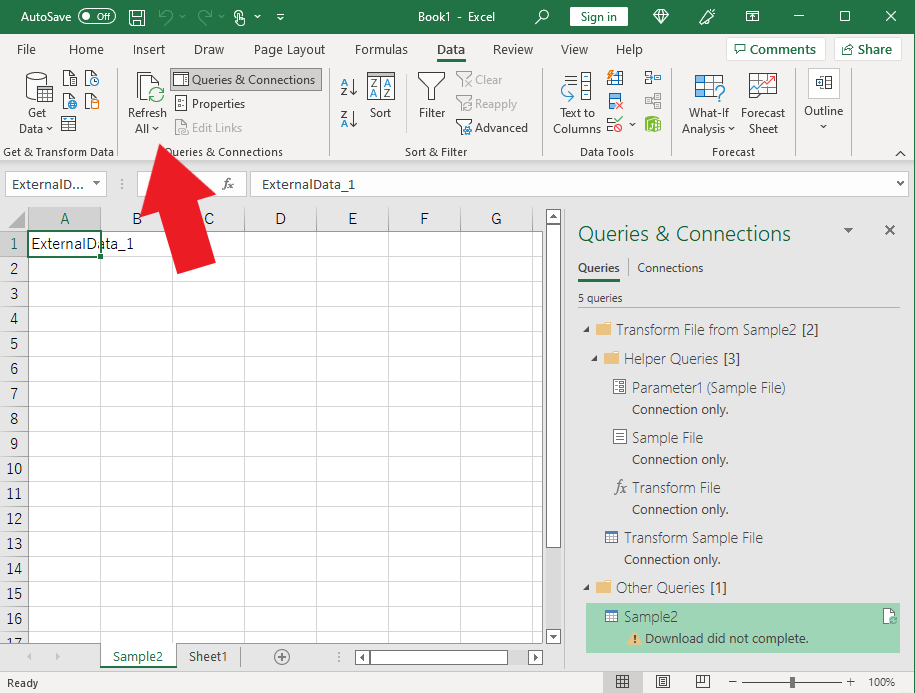
Click OK on the error message.
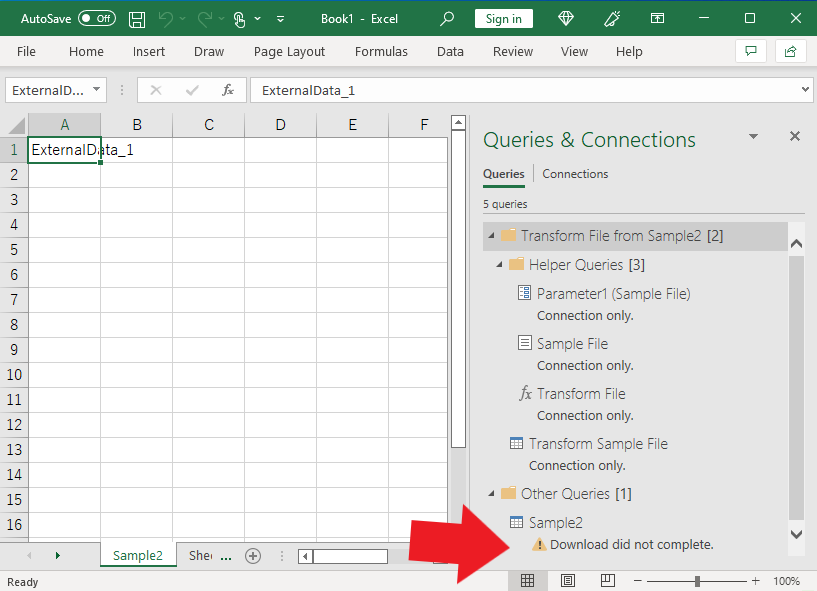
Double-click “Download did not completed” at the bottom of the “Queries & Connections” window on the right side of the Excel book.
The Power Query editor has opened.
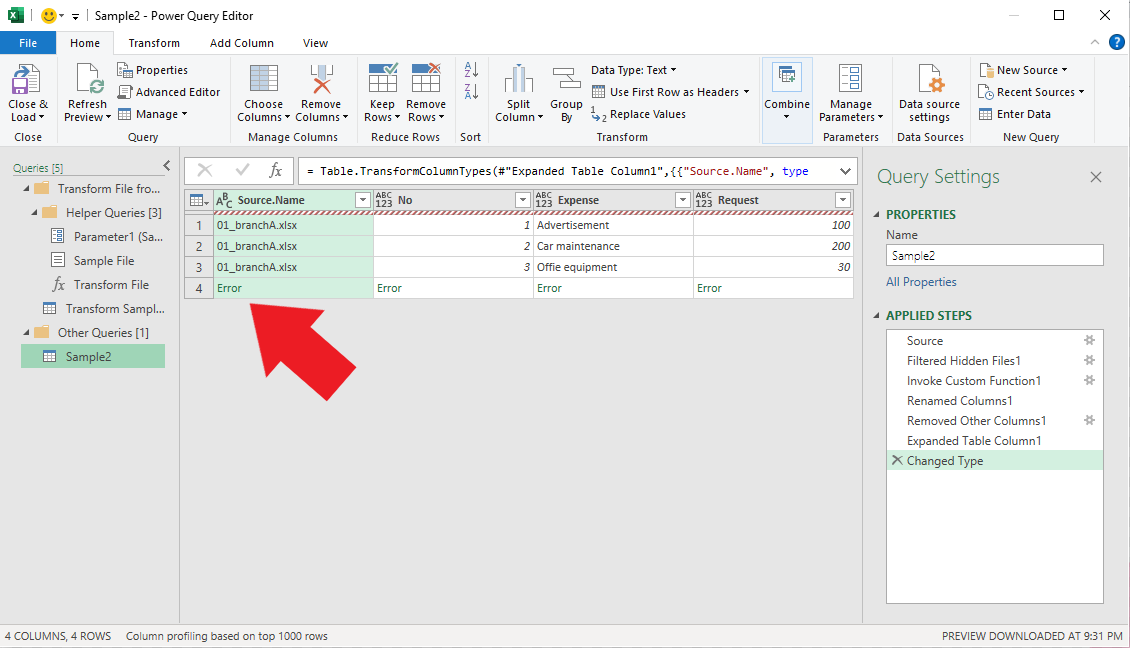
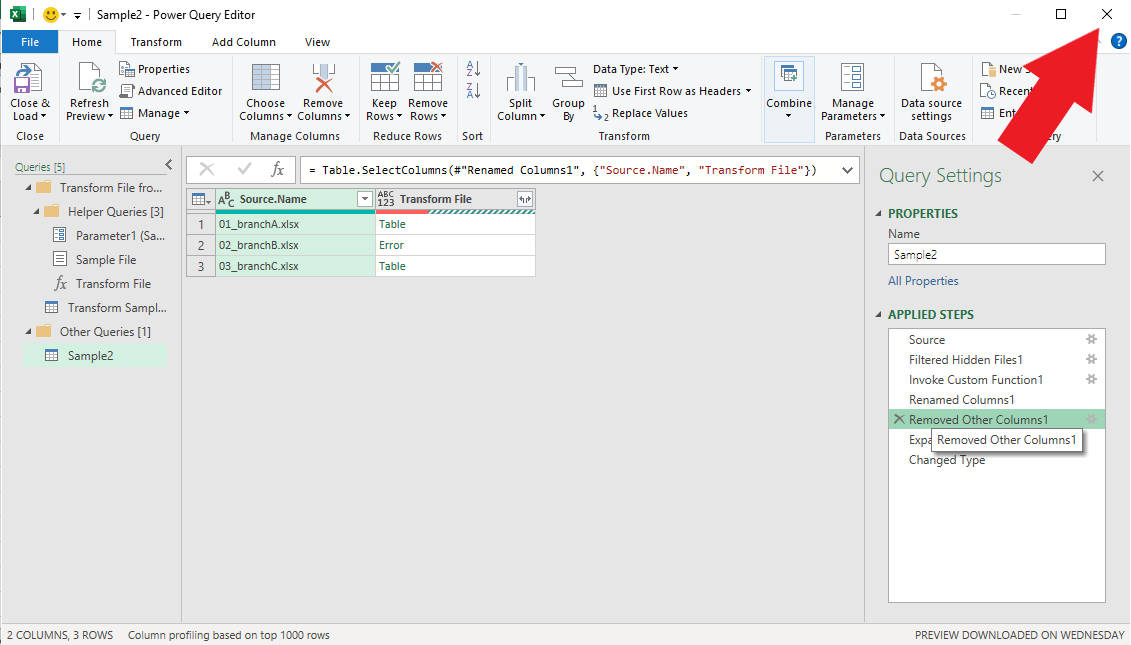
The fourth line in the center is labeled Error, indicating that an error occurred following “01_branchA.xlsx” up to the third line.
Click on Error.
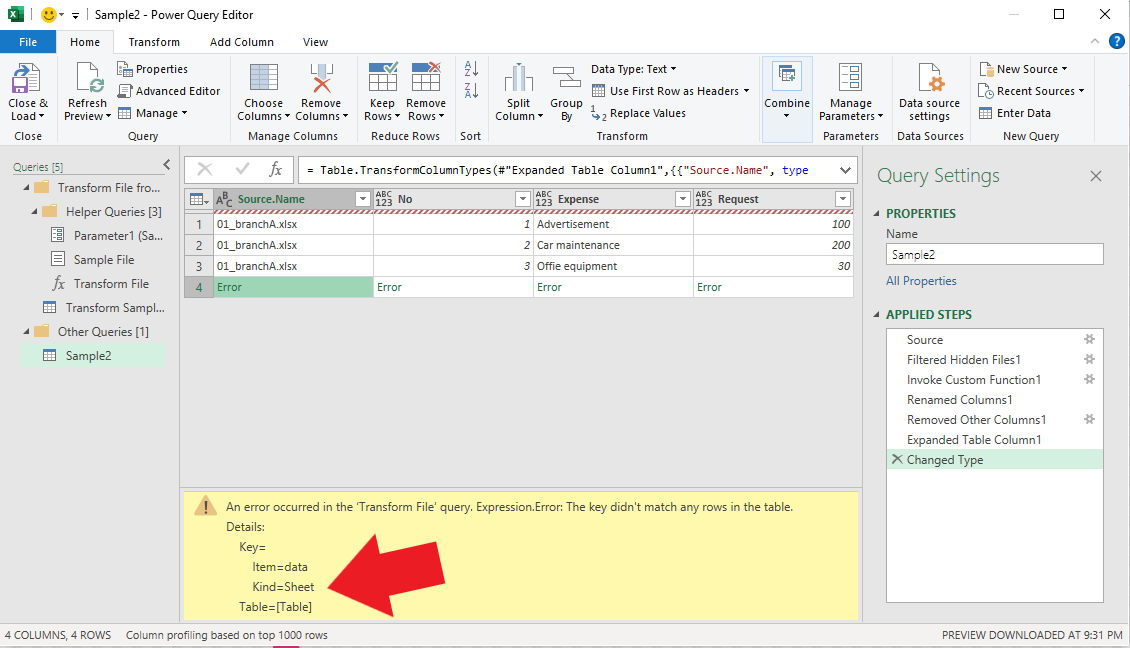
Since “Kind = Sheet” is displayed, you can see that the type of error is related to a sheet.
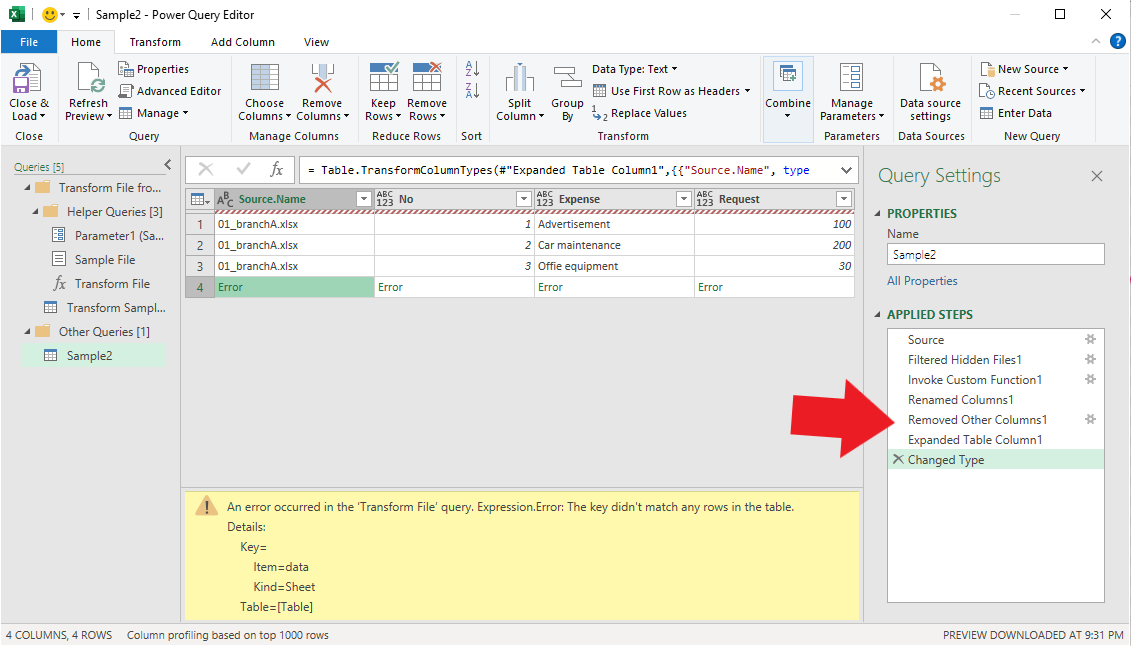
To identify which Excel book has the error, click on “Removed Other Columns 1” of APPLIED STEPS.
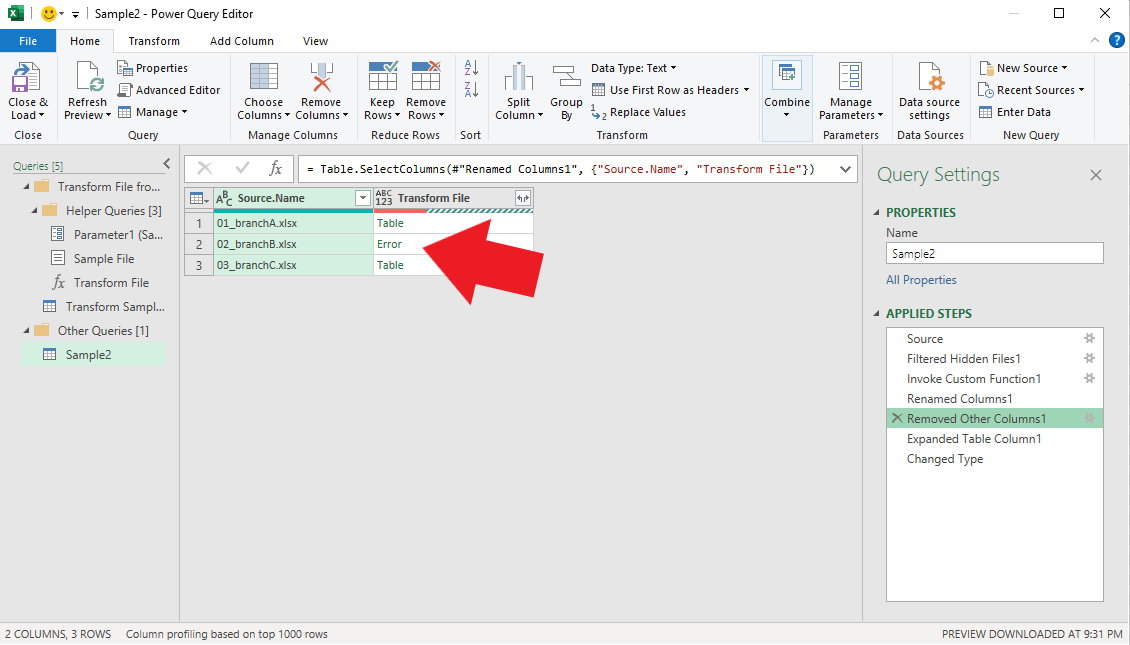
The Excel book in which the error is occurring has been identified as “02_branchB.xlsx.”
| 📌NOTE |
|---|
|
Now I will explain how to eliminate the error.
How to eliminate the error
As far as I can tell, there are two ways to eliminate the error.
Rewrite the sheet name
After finding an Excel book that has an error as described above, close the Power Query Editor.
However, do not close Excel and leave it as is.
Then open the Excel book detected the sheet name error.
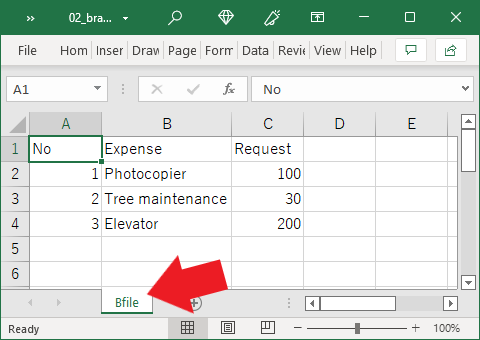
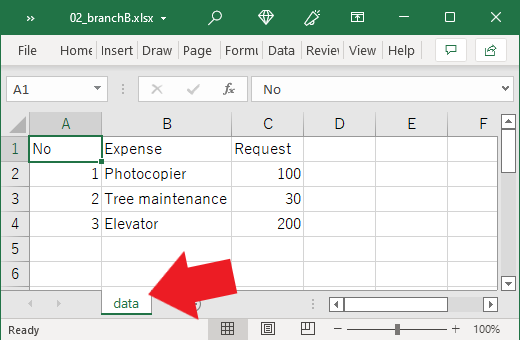
Rewrite the sheet name from “Bfile” to “data” and save it.
Return to Excel during the combining process and click “Refresh All” on the “Data” tab.
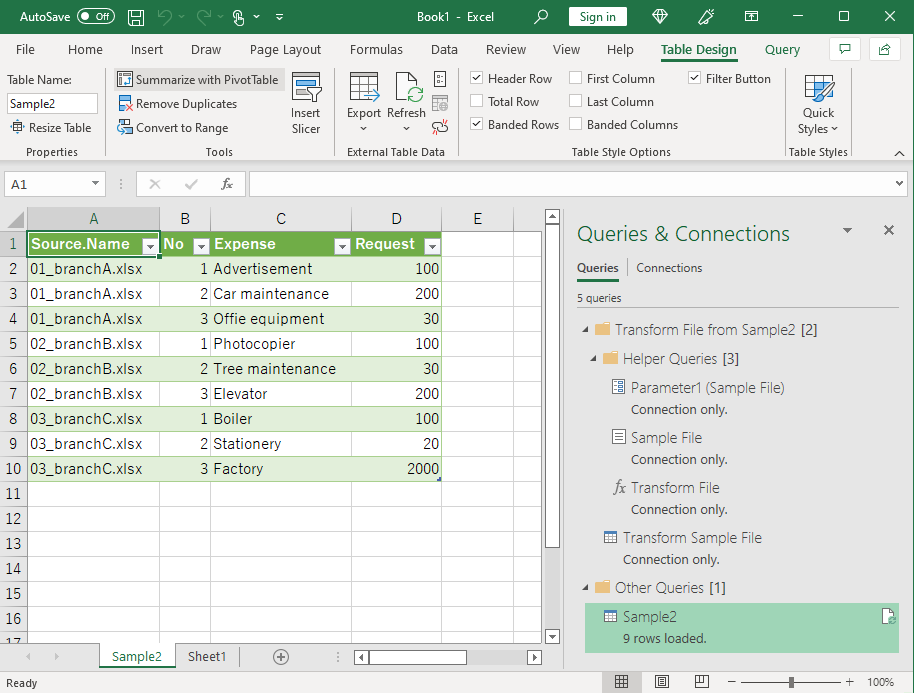
The error has been eliminated and the data has been combined.
It takes a bit of work, but I always fix it this way.
Convert them to CSV files before loading
Another solution is to convert all Excel books to CSV format and then combine them.
Converting Excel books to CSV will not cause errors due to sheet names in the combining process.
However, this method is limited to the case where the Excel book has only one sheet.
Also, Excel does not have the function to convert multiple Excel books to CSV at once. Therefore, it is necessary to open the books one by one and convert them to CSV.
Wrapping up
To combine multiple Excel books in Power Query, their sheet names must be the same.
If the sheet names are different, you should open the Excel books one by one and correct the sheet names.
If I find an easier way, I'll add it to this article.