Efficient editing of image file names, formats, and sizes with Shortcuts
We will show you how to efficiently edit images for your blog using Shortcuts app on your iPhone.
Overview of image editing tasks and shortcut recipes
When posting to WordPress, it takes a lot of time and effort to process the images.
Using Shortcuts, a pre-installed app in iOS, you can save your time for image editing tasks, especially routine and repetitive tasks.
The work to improve efficiency with this shortcut is as follows.
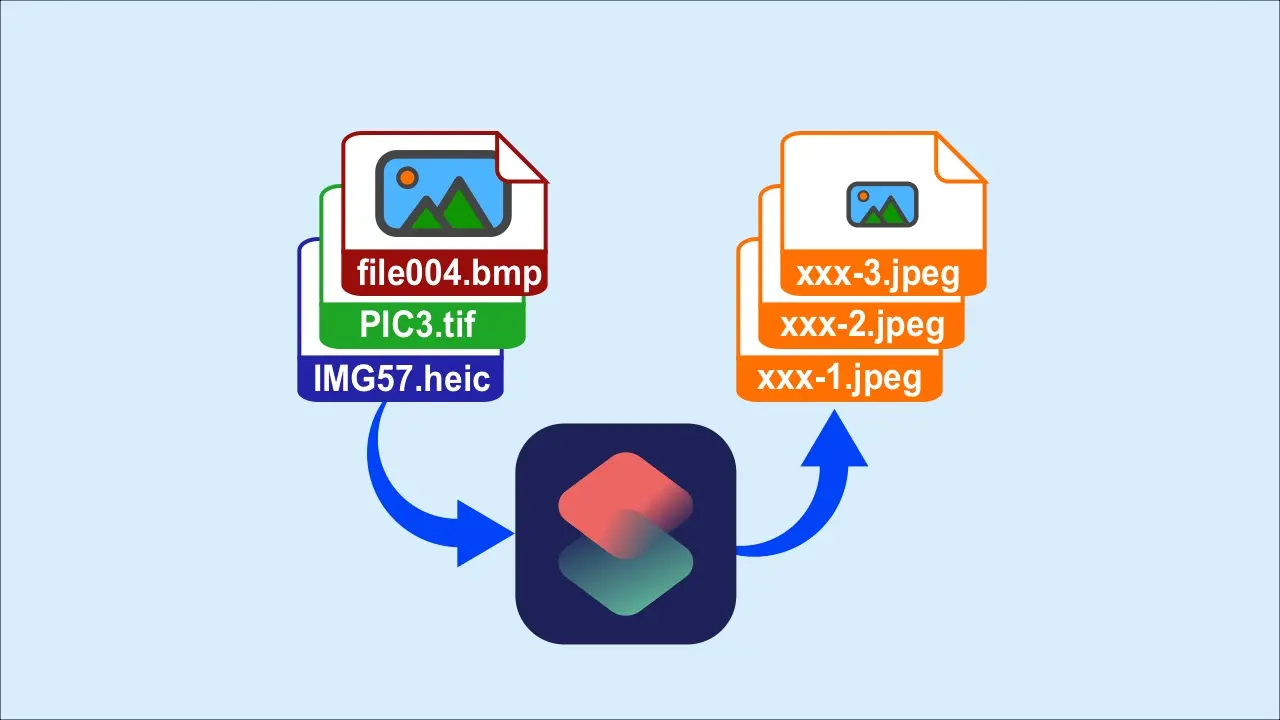
Rename
Convert the file names of multiple images to “common strings_numbers”.
For example, the file names will be “xxx_1.heic” and “xxx_2.heic”.
Format Conversion
Convert the image format to JPEG.
For images taken with the iPhone camera, “xxx_1.heic” is converted to “xxx_1.jepg”.
Converting to JPEG format reduces the file size.
Resize
Convert the size to 800 pixels wide while keeping the aspect ratio of the image.
You can set the height dimension, but the settings in this article fix the width and aspect ratio.
Save
Save the converted image files to the Files app of iOS.
The reason to save the image files to the Files app will be explained later.
I have added an explanation to the shortcut processing screen, which was created using iOS 14.8.
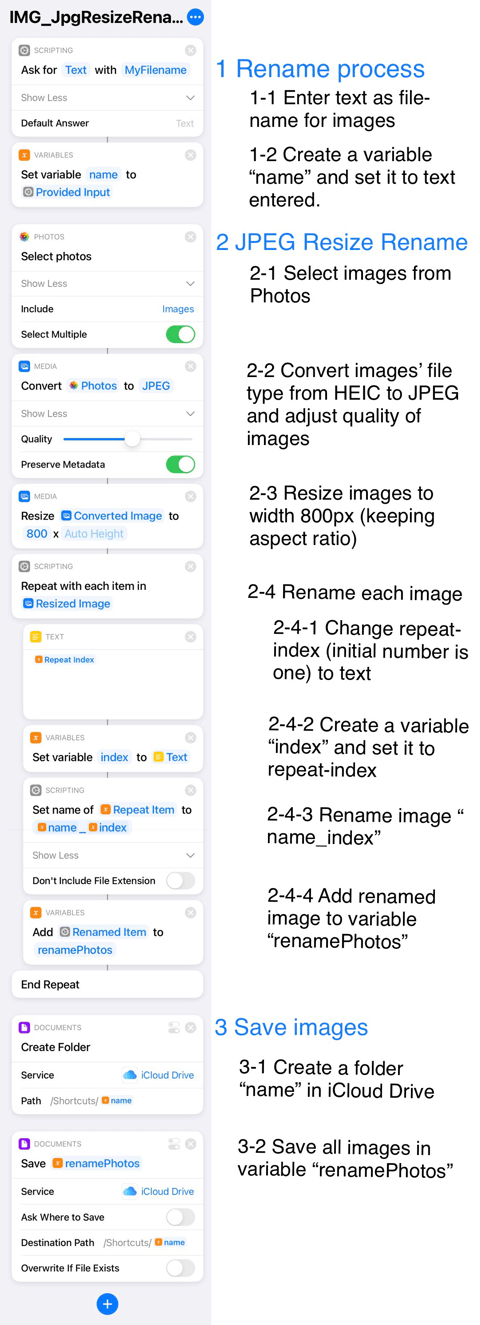
How to use the shortcut you made
- Prepare the images you want to edit in the iPhone's Photos app.
- Launch the shortcut.
- Enter the file name for the images in the field that appears.
With just this, a folder with the same name as the image files’ name will be created in the Files app, and the converted image files will be saved there.
Other image editing methods
WordPress(ver.5.8.2) admin panel
You need edit the following one by one.
- Change the image size
- Trim the image
- Rename the image file
Even if you change the image file name, the permalink of the image will not be changed.
Official WordPress App for iOS
You can change the image file name only.
Other edits such as changing the file size are not allowed.
WordPress Plugins
If you enter “Resize” or “Rename” in plugin search, you will get many hits.
The plugins allow you various editing, but you will not know the details unless you use them.
Perhaps there are plugins that make editing easier than the shortcut-based editing method introduced here.
Reasons to save images in the Files app
Amount of Information you can see
In the list view of the Photos application, only the image is displayed and no other information is shown.
To check the format and file size in the Photos app, you have to select each image one by one and tap the information mark.
In addition, the resolution information is not displayed in the Photos app.
On the other hand, the file size is displayed in the list view of the Files app.
Also, if you press and hold an image in the list view, the information including the resolution will be displayed.
Upload images from the WordPress media management screen
When uploading images, on the screen for adding new media, tap “Select file” to display the following list list.
- Photo Library
- Take a photo or video
- Select file
Selecting “Select File” will allow you to upload image data stored in the Files app.
Note that Dropbox can be selected for this “Select File”, but GoogleDrive and OneDrive cannot be selected.
Folders can be saved for images.
Unlike the Photos app, images used for posting blogs can be saved in folders, making it easier to organize information.
Furthermore, if you use the same string for the folder name and the slug of the post, it will be easier to understand.
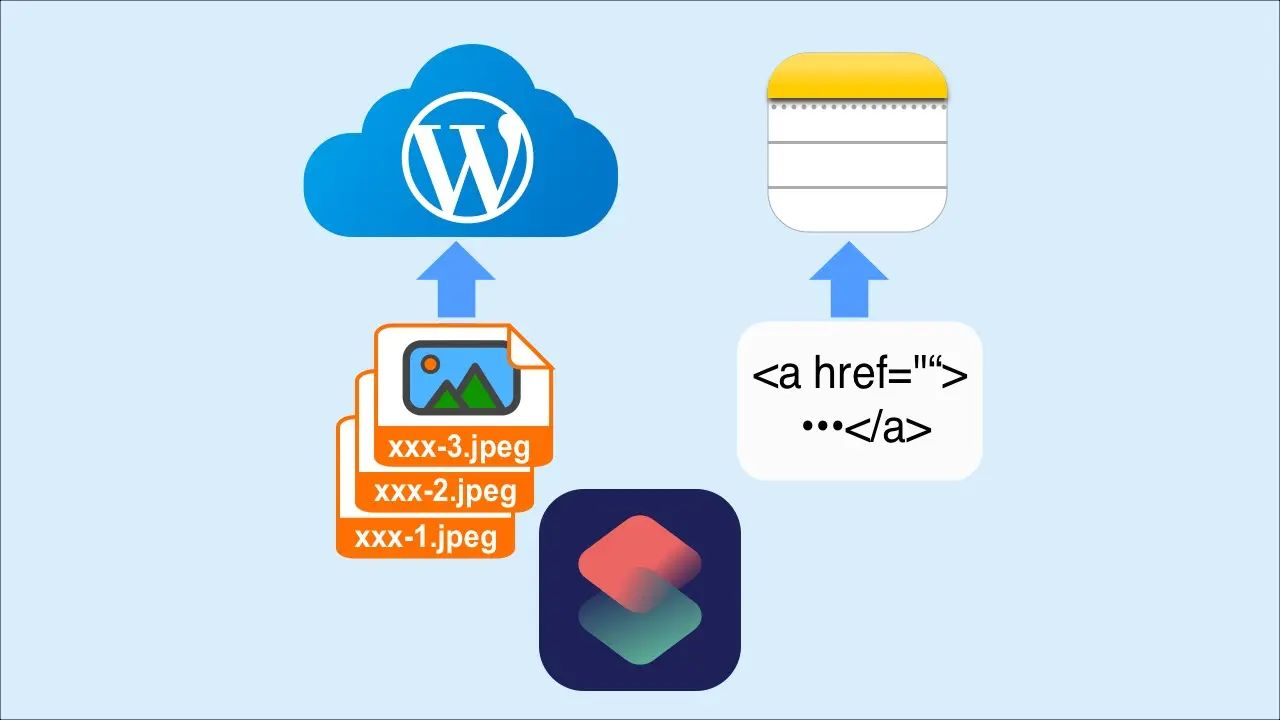
In the next article, we will show you how to use the shortcut app to upload the image files stored in Files app to the WordPress server at once, and then add links for the image in html to the document written in Notes app.